Intégrer l'authentification unique (SSO) via SAML
Setting up Single Sign-on (SSO) makes it easy for your users to log in and use the e-learning platform. Let’s take you through the steps needed to set up SSO.
Prerequisites
To get started, the following things are needed:
An active Mircosoft Entra ID subscription
An active SoSafe license
You must have created an application and assigned users as shown in the SCIM instructions in steps 1 and 2.
Preparation
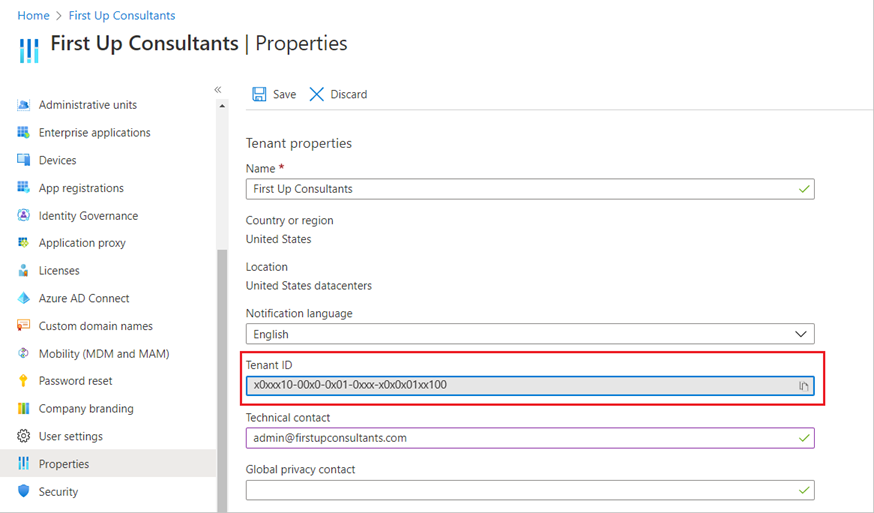
Before you can set up SSO in your Azure portal, you must provide SoSafe with your Tenant ID.
To find your Tenant ID, goto https://portal.azure.com/ and select Microsoft Entra ID, followed by Properties. You might have to scroll down a bit to find the Tenant ID box.

Setup
Once you’ve completed the preparation phase, the setup is fairly straightforward.
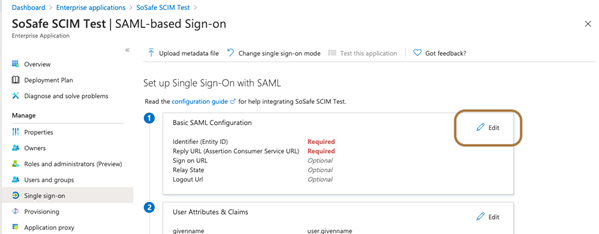
Go to the Azure portal, select Enterprise applications and go to the SoSafe application.
Here, select Manage and then Single Sign-On.
Select SAML as the Single sign-on method.
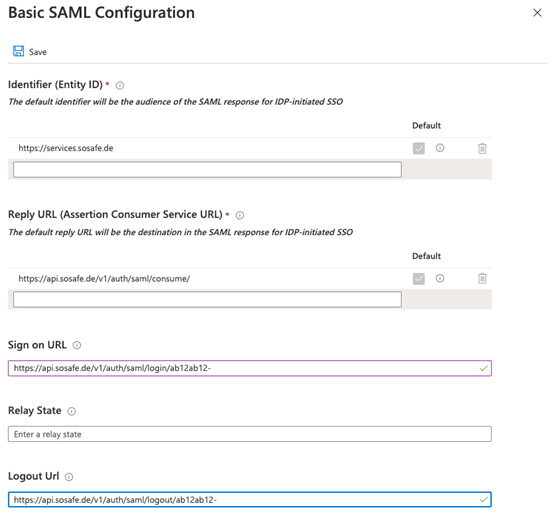
On the page Set up Single Sign-On with SAML, select Edit. A new dialog will open.

Below are the URLs that must be entered during the Entra ID setup. Please ensure to replace the placeholder <your Azure Tenant ID> with your actual Tenant ID.
In the Identifier (Entity ID) text box, enter the corresponding URL.
In the Reply URL (Assertion Consumer Service URL) text box, enter the corresponding URL. It should look roughly like this:
https://api.sosafe.de/v1/auth/saml/consume/In the Sign on URL text box, enter the corresponding URL. It should look roughly like this:
https://api.sosafe.de/v1/auth/saml/login/<your Azure Tenant ID>In the Logout Url text box, enter the corresponding URL. It should look roughly like this:
https://api.sosafe.de/v1/auth/saml/logout/<Your Azure Tenant ID>
Select Save.
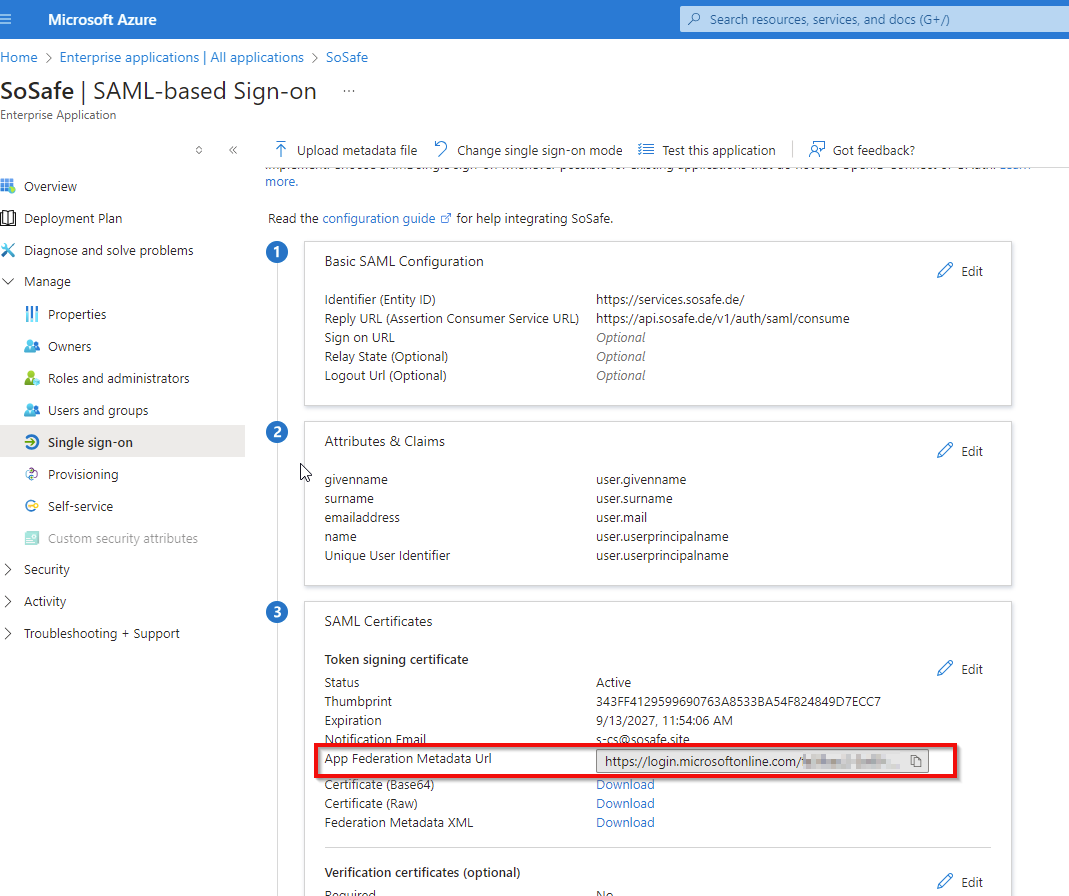
(Optional, but recommended:) Send the App Federation Metadata URL (found in section 3) to your SoSafe contact person.

(Optional, but recommended:) Test the setup.
Alternate method
Follow the the first 2 steps in the instructions above.
On the Set up single sign-on with SAML page, scroll to the SAML Signing Certificate section and select Download next to Certificate (Base64).

On the same page, scroll to Set up SoSafe and copy the 3 links provided there (Login URL, Azure AD Identifier and Logout URL).

Send those links alongside the contents of the certificate file from step 2 (you can open the certificate with a text editor) to your SoSafe contact person. They will then add that information to our systems and get back to you once that has happened.
(Optional, but recommended:) Test the setup.
